Google Analytics 4 or GA4 is an analytical tool that allows collecting event-based data from websites and mobile apps. Valuable data and reports from GA4 give business owners an understanding of the customer’s journey. GA4 Shopify integration depends on the Shopify version used. In the space below, we will see how to set up GA4 in Shopify and install GA4 on Shopify.
Create a Google account and a Google Analytics account
A Google Analytics account is a must before we jump into tracking your Shopify website to understand how your visitors interact and engage with your website. Head to the Google account you want to set up Google Analytics on.
You must sign up if you still need to set it up. Click the Sign-Up link to proceed, and accept both terms – “Analytics Terms of Service” and the “Data Processing Amendment.” After completing that step, you’ll see a welcome to Google Analytics page.
After logging into your Google Analytics account, you can click “Admin” at the bottom-left of the page. Here in the “account,” click the “Create Account” button. Select the data-sharing options and add the account name to identify your website analytics. Enter the website URL that you want to track. Select your time zone and select your time zone and the preferred currency. If you receive a visit to your Shopify store on a Saturday morning, it’s recorded as a Saturday morning visit even though the visitor’s time zone may be Friday night.
Create a Google Analytics 4 property
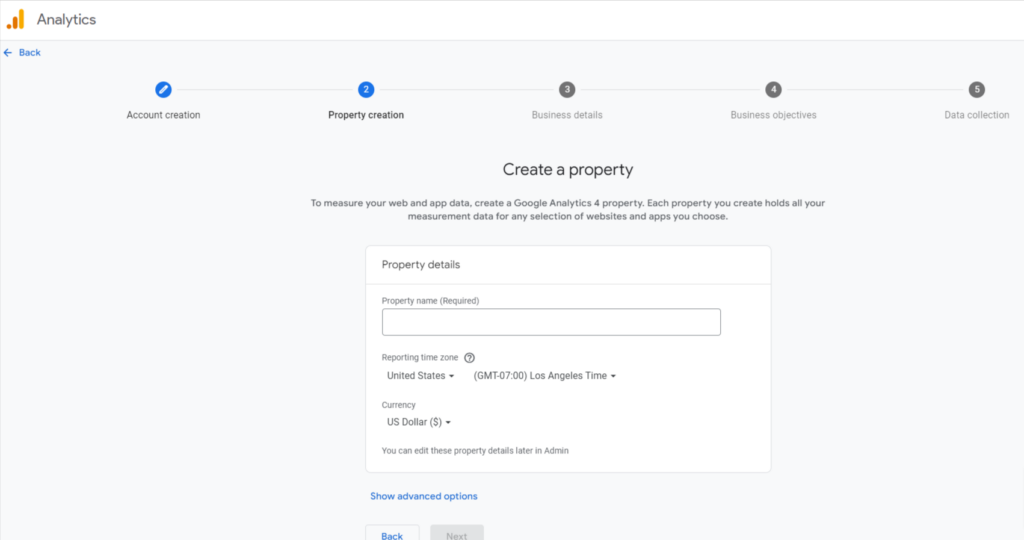
To add GA4 properties, you need an Editor role. You can add up to 2,000 properties to your GA4 account. Under “Account,” click “Create Property” below the property column. Assign a name for the property, and set the time zone and currency.

Select the relevant industry category and your approximate business size.
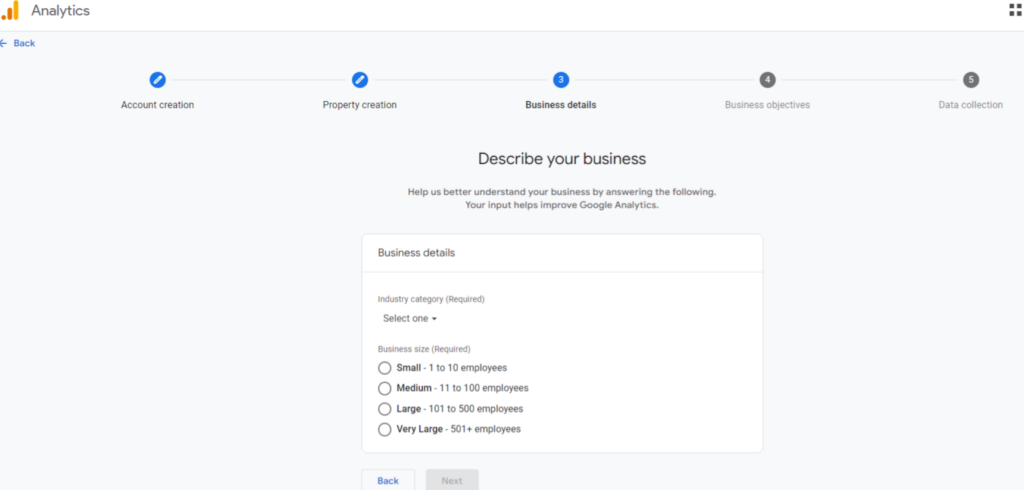
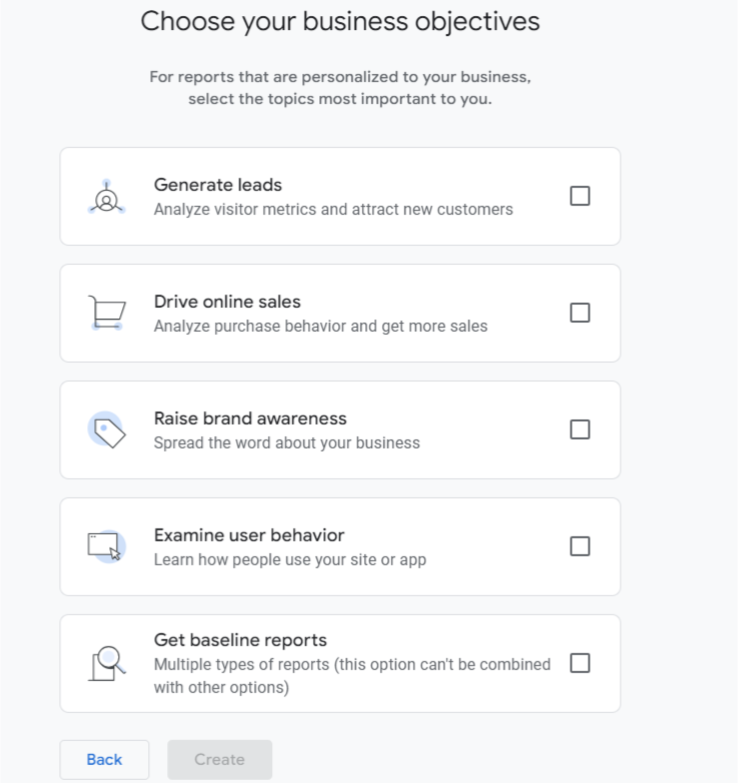
click “Next,” and configure how you’d use Google Analytics, like generating leads, driving online sales, etc.
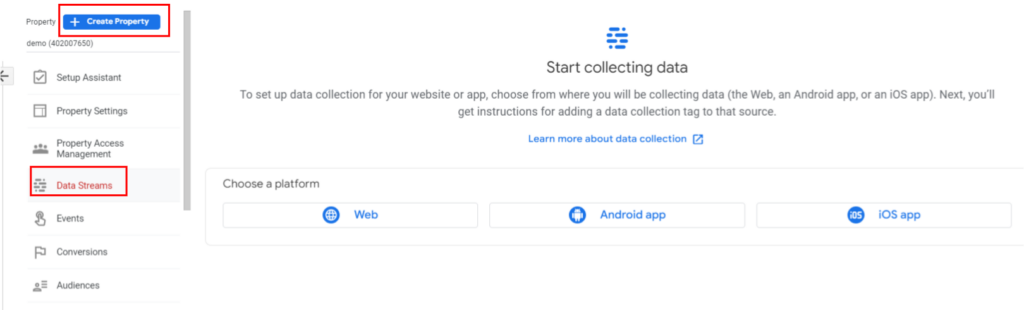
Add a data stream
Under the property column, click “Data Streams” and “Add stream” next iOS, Android, or Web app. Select your website’s appropriate source and URL and a meaningful data stream name. Enable “enhanced measurements” if you’d like to collect page views and other events, and click “create stream”.
Method 1: Set up adding Google Analytics 4 tags
Before you set up your Google tags for measuring different actions of your website visitors, you’ll need a Google-provided Javascript code box. Google Analytics properties have tag IDs starting from “G-.” Google Analytics comes integrated with Shopify, saving you some additional steps. Follow the below steps for installing a Google tag on your Shopify account.
1. Sign on to your Shopify Account
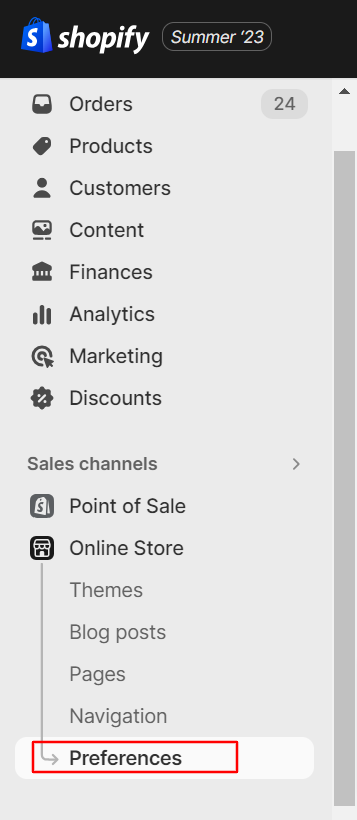
2. Click the “Online Store” dropdown from the left side panel
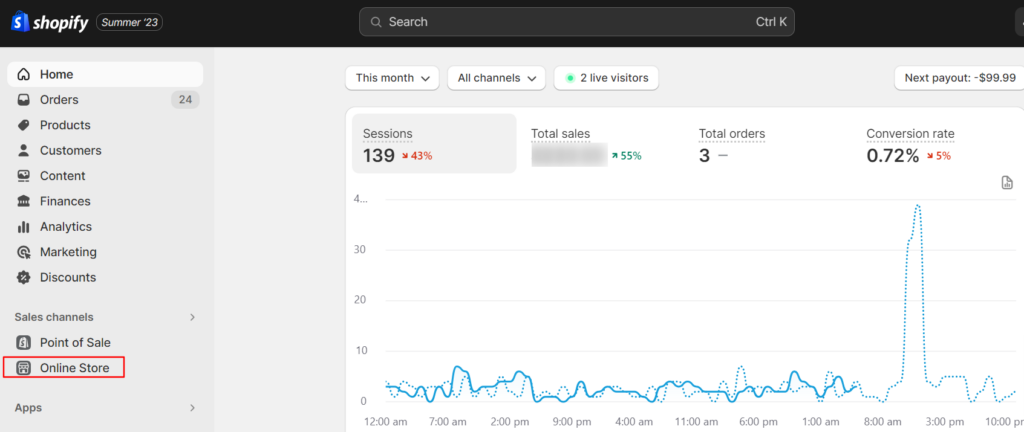
3. Now, click “Preferences” among the menu items
4. Go to the Google Analytics account and find the “Manage pixel here” option
5. Here, if you don’t have a Shopify app, click “Add sales channel” and click continue
6. If the Shopify app isn’t connected to Google, follow the next step
7. Click “Connect” and select the Google account where you’ve defined the Analytics property.
8. In the dropdown list, select the Google tag ID and click “Connect your Google Analytics 4 property” to proceed.

Method 2: Add Google Analytics 4 tags manually
The former method is more straightforward via Google & YouTube apps on Shopify. But there may be exceptional cases where you’d want to manually add a Google tag to your Shopify website. An advanced user must take up this manual setup as it involves several steps, increasing the chances of something going sideways and preventing you from accurately tracking data and user actions. If you like to set up tracking Google Analytics manually, here’s how you can do it.
1. Go to the Admin screen in Google Analytics
2. Under data streams, select the data stream to see more details
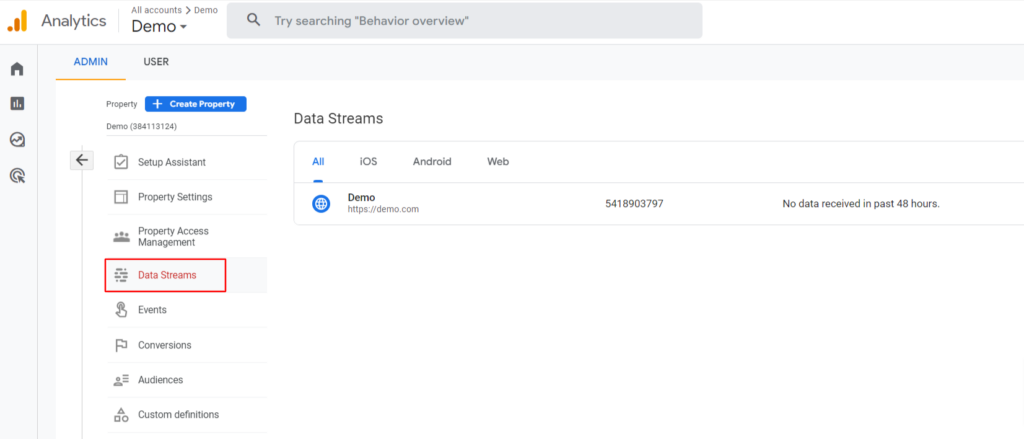
3. Here you can explore more Google Analytics settings as well as Google tag settings.
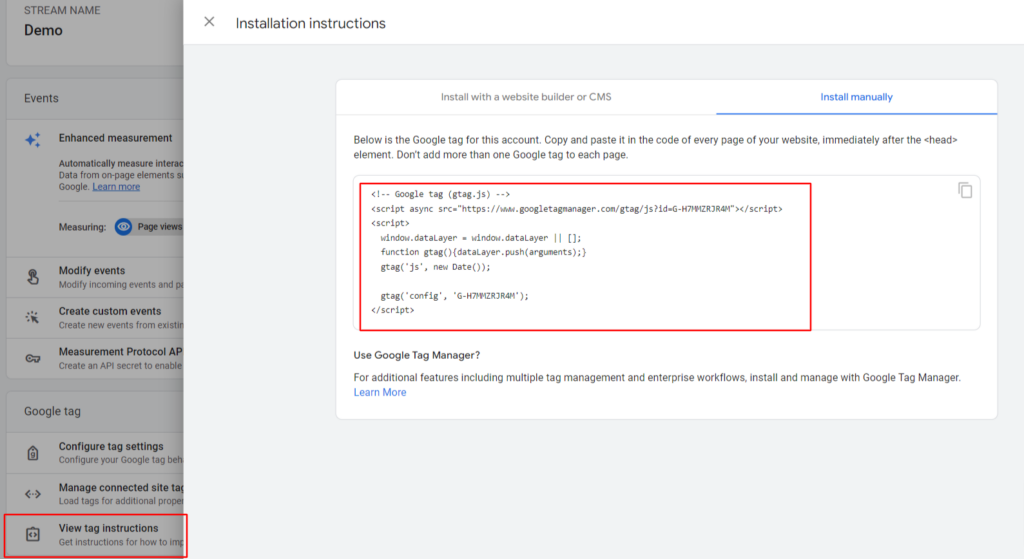
4. At the bottom of the page, locate “View tag instruction” and click on the “Installation manually”.
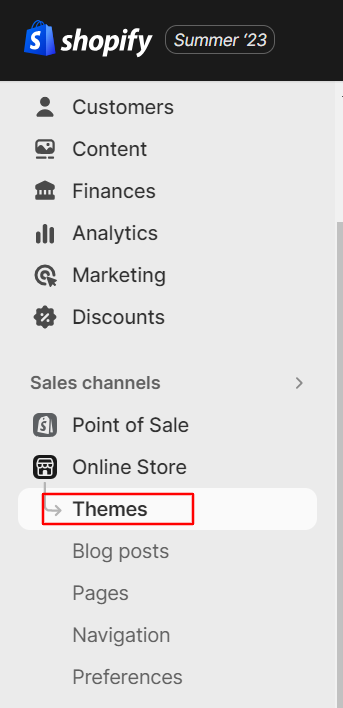
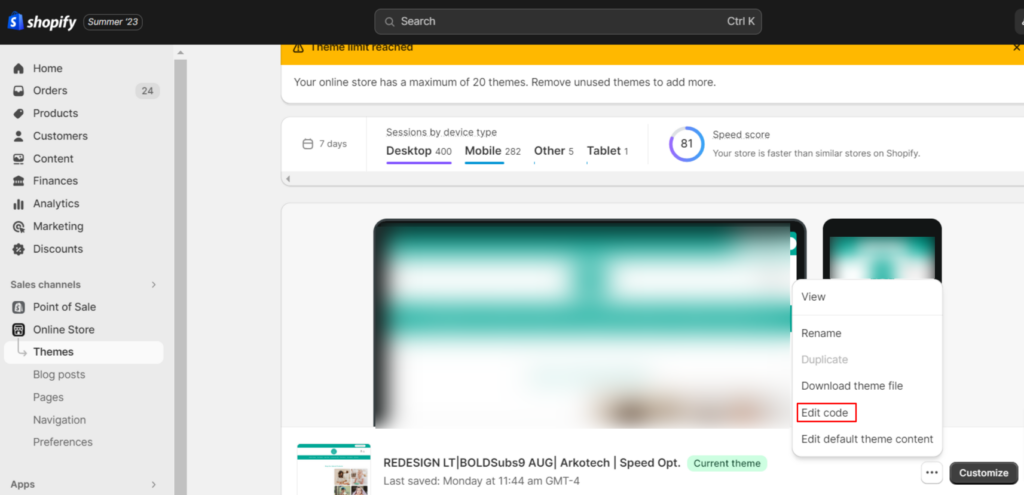
5.Log into your Shopify account and choose “Online Store” and “Themes” located on the left panel
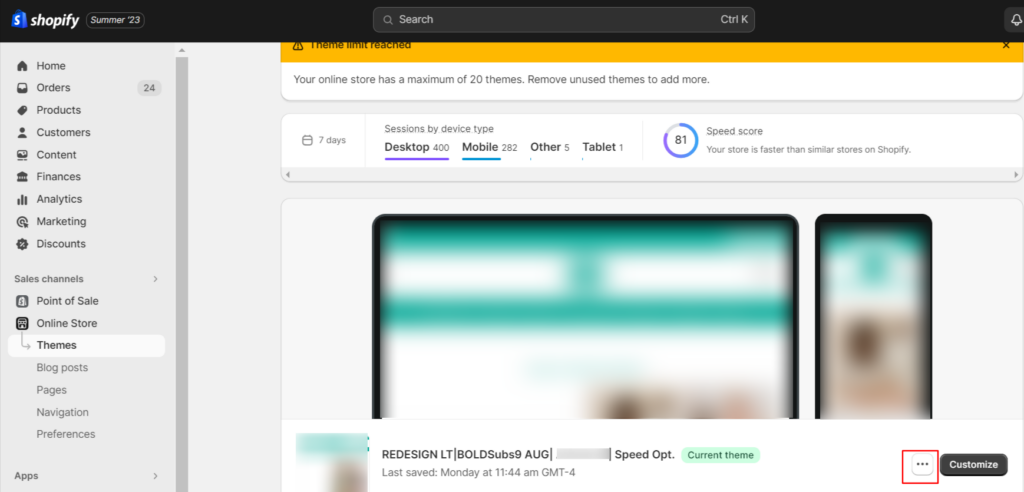
6. Select the button with three dots on the current theme and click the dropdown of “Edit Code”
7. Here go to “Layout” and select the “</> theme.liquid” on the menu
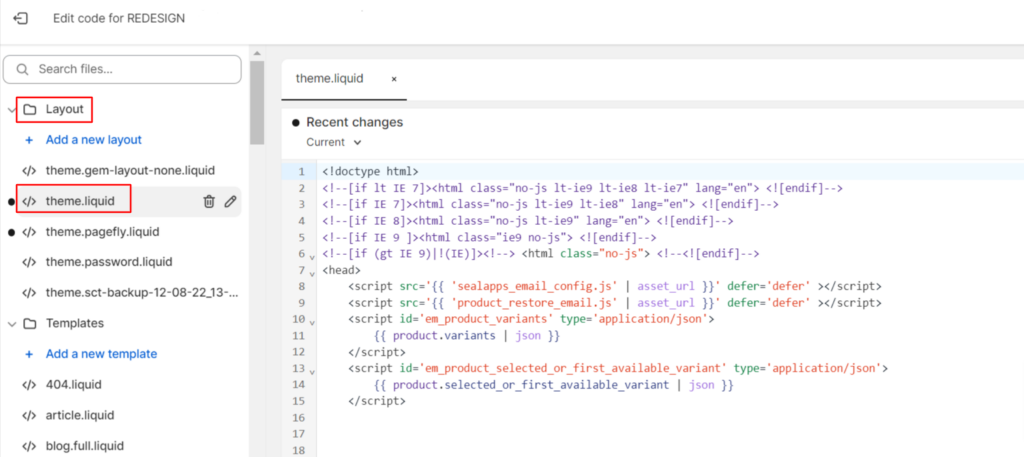
8. At this point, ensure there are no Google tags already present
9. It’s time to connect your website with GA4. Copy and paste the Google tag code after the <head> tag.
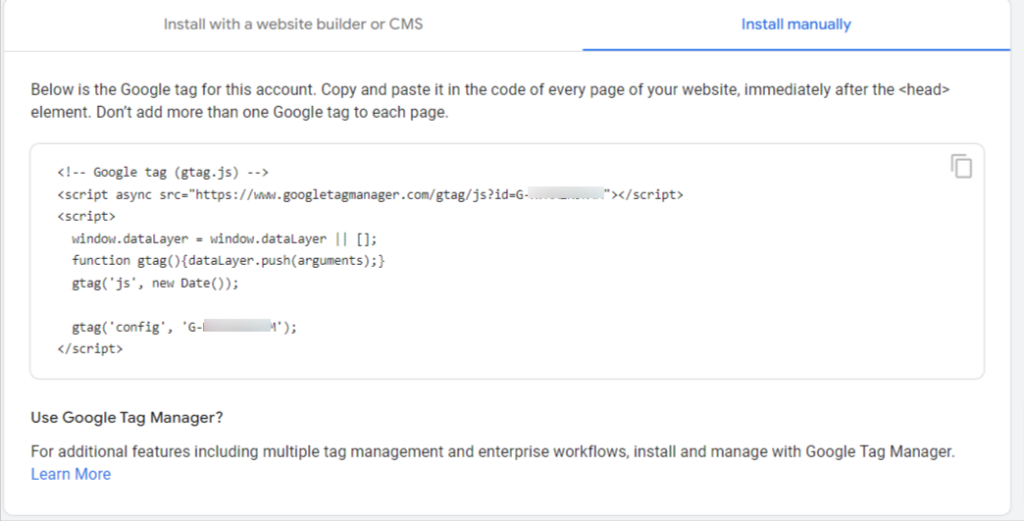
This code starts with <!– Google tag (gtag.js) –> and ends with </script>
10. After you click “Save”, you’ve completed adding the Google tag manually
Method 3: Install Google Tag Manager Container in your checkout
Shopify Plus users can also add the GTM to the checkout.liquid file. Add a Google Tag Manager container to standard Shopify users’ order confirmation and checkout steps. With Shopify and GA4, you better view your customer’s behavior and can execute planned actions better.
When installing the code into Shopify, be sure you pay attention to these two primary areas:
- “theme.liquid” (i.e., all pages except the cart and checkout): Even if you don’t have a Shopify Plus account, you can still access and modify the theme.liquid file. ‘theme.liquid’ should have GTM installed following Shopify’s requirements.
- code on checkout pages is managed by a file called “checkout.liquid.”: people without a Shopify Plus account won’t be able to see it.
However, the problem is adding a GTM container to the checkout pages without a Plus account. The bad news is that you can only use a GTM container on your checkout pages if you upgrade to Shopify Plus. Fortunately, you can integrate GTM into the order confirmation page.
To install the GTM container to your checkout (order confirmation pages):
If you don’t have a Shopify Plus account and want to add a GTM container to the purchase confirmation page, you may do it as follows:
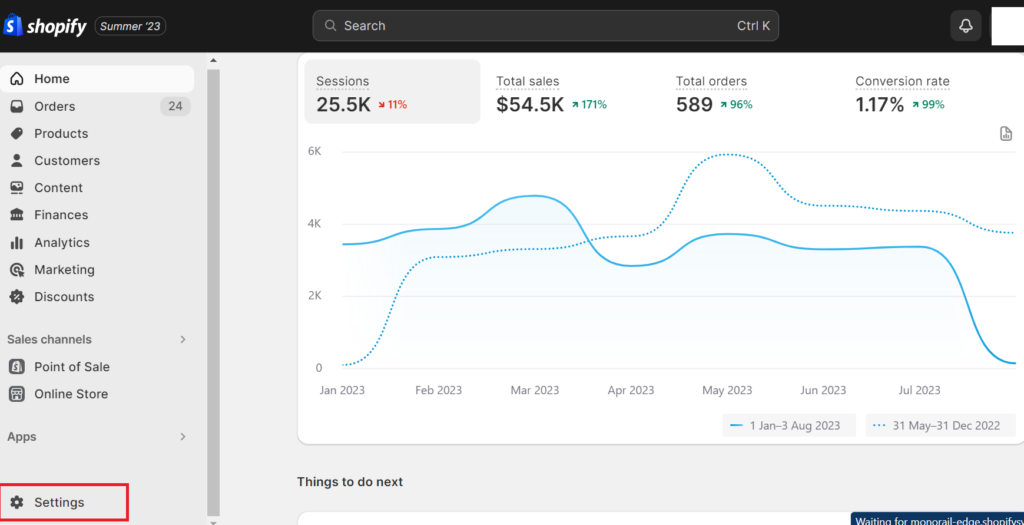
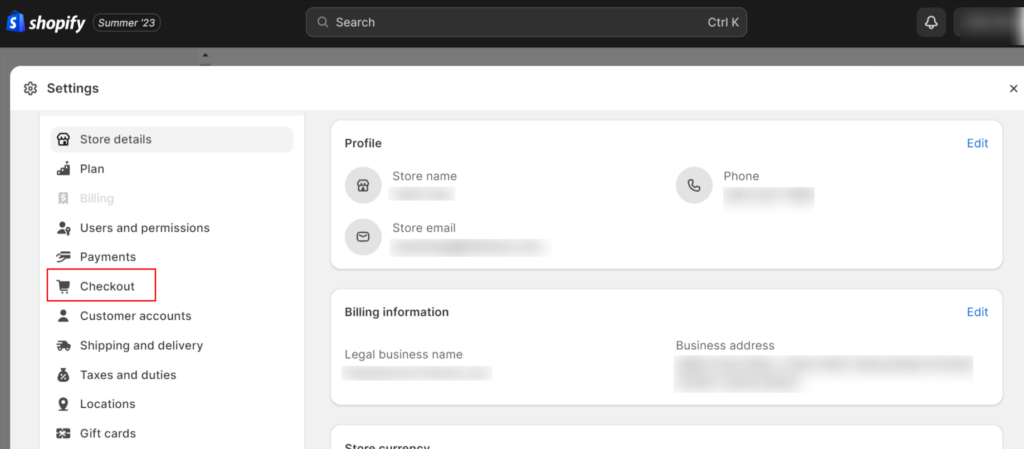
Step 1: From the navigation bar on the left side menu, choose “Settings.”
Step 2: A “Checkout” option should appear in the menu in the next frame.
Step 3: Now, choose “Order Processing” from the drop-down menu.
Step 4: Paste the code for your GTM container into the ‘Additional scripts’ box.
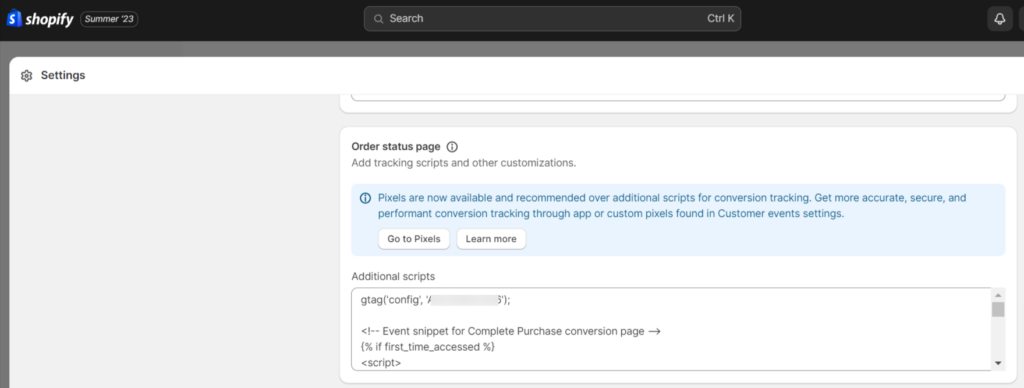
Step 5: Once you’re satisfied with the container’s configuration, save your changes and run the debug.
Including these domains eliminates the possibility of checkout pages being misinterpreted as self-referrals in GA4 reports.
Default-tracked GA4 events
After completing this process of setting up GA4 on your website, a few e-commerce events will have the tracking data present by default. The following are the default-tracked events:
page_view: Tracks a customer visit to your online store
search: When customer search for a product in your store
view_item: Tracks if a customer views a product
add_to_cart: Understand if a customer adds a product to the cart
begin_checkout: Tracks when the customer begins the checkout process
add_payment_info: This event tells if a customer entered payment information
purchase: When a customer completes their checkout
What if you’re one of the people who want to add more events than the default ones now that you’ve learned about this concept? This blog has a detailed tutorial on using GA4 eCommerce tracking in GTM, from which you may draw helpful information.
Even after adding these events while setting up GA4 in Shopify, we still need to weigh the benefits and drawbacks.
Benefits
- Automatic Tracking: Connecting the Google Shopify app automatically tracks default GA4 events.
- Auto-Generated Google Merchant Feed: The app generates Google Merchant Feed automatically, facilitating Google Advertising.
Drawbacks
- Manual Event Implementation: Events not tracked by default in GA4 must be implemented manually through GTM.
- Parameter Control Limitation: You lack control over parameter value changes.
- Dependency on App: If you disconnect the app, you must implement all events via DataLayer Implementation through GTM.
- Google Advertising Impact: Disconnecting the app halts the functioning of the Google Advertising feed.
Following the step-by-step guide, you’ll comprehend how to incorporate additional events to align with your business needs. The knowledge will also equip you to navigate the limitations of the manual process and expedite the entire procedure seamlessly.
Tracking additional Google Analytics 4 events
If you wish to track more GA4 events, you can change Shopify’s theme code and use the gtag.js API to send events to your GA account. Editing theme files means changing HTML, CSS, JSON, and JavaScript apart from Shopify’s Liquid. So ensure you have a backup of the theme code file. Shopify’s inbuilt Theme Check allows you to identify the below errors in edited code:
1. Parser blocking scripts
2. Inconsistencies like missing translation keys or translations that don’t match in a locale file
3. Missing templates
By adding scripts to the checkout settings in the Shopify admin, you can even track post-purchase events.
Link Google Analytics account to your Google Ads account
There are multiple benefits to linking Google Analytics to Google Ads account because of the data exchange between both data-rich platforms and understanding your paid advertising efforts to your marketing channels. Here are some reasons why you must consider doing so:
Understand the customer’s entire lifecycle – See an end-to-end picture of your customer’s journey in your store
Collect Ad and website performance data: See detailed Google Ads reports in Analytics
Import Google Analytics: Fetch Google Analytics goals and e-commerce transactions into your Google Ads account.
Advanced metrics: Measure useful website metrics like Bounce Rates, Average Session Duration and Pages or Session in your Ads account.
Remarketing: Improve your Google Ads remarketing with Analytics Remarketing and Dynamic Remarketing.
Conclusion
GA4 provides a detailed analysis of user behavior on the event data. In reports, companies can better understand individual user journeys. With customizable and timely data, GA4 on the Shopify website makes it a tool for analyzing customers’ buying journeys on the e-commerce website. Data collection and presentation help drive actions on your website or app with meaningful insights.

FAQs
Signup for a Google Analytics account if you haven’t already. The first step is creating a Google Analytics property. Select the Google Analytics Account under which you’d like to create the property. Go to “Admin,” select “Create Property,” and name the property. Next, you must create a data stream. Click “Data Streams” under the property and select “Web.” Name the stream after entering your Shopify App Listing URL and click “Create stream.”
After this, copy the Measurement ID by clicking the icon. Next, log into your Shopify Partner Admin, and edit the app listing of the app that you’d like to track. Inside “Tracking information,” you will find the Tracking ID field. Here paste the Measurement ID from the previous step. Once you click “Save & publish,” you’re set up for tracking.
To install the tracking on your Shopify store, go to your Shopify admin. Click “Online store” then “Themes.” Locate “Edit Code” from the dropdown. Go to your Google Tag Manager and copy the code snippet. Head to the Shopify Admin and open the theme.liquid file.Now, in the theme.liquid file, paste the copied code snippet in the “HEAD” HTML tag. Next, head back to GTM. Copy the second code snippet and paste them in the “BODY” HTML tags of theme.liquid and checkout.liquid code files. Click save to complete the installation of GA4 in your Shopify Store.